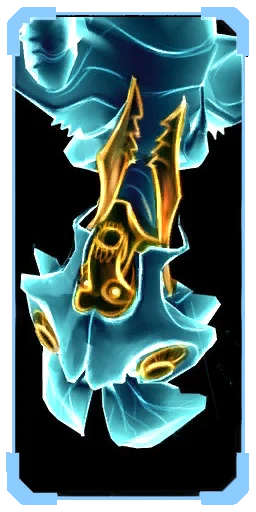
Flaahgra's growth cycle has been radically accelerated. As a result, it requires near-constant exposure to solar energy to remain active. This exposure has made Flaahgra's outer shell thick and durable. Its lower root system is unprotected and vulnerable, however. Exploit this flaw when possible. Concentrated weapon fire can daze it for short periods.
사이트 및 데이터 조사: 101Leafy
Flaahgra
Morphology: FlaahgraThis mutant plant is the source of toxic water in the Ruins.

책과 잡지에서
소개
Flaahgra
Flaahgra is the huge flower that has been making all the water around Chozo Ruins toxic.
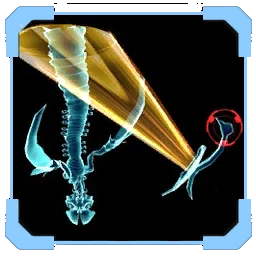
You must shoot the red orb at the bottom of the reflectors to knock them over.
약점은 한 세트의 거울 반사판이다. 사무스의 무기로는 잠깐 기절시키는 것밖에 할 수 없다. 그래서 Missile Launcher와 Charge Beam도 기절시키는 용도로만 추천한다. 기절시킬 때마다 햇빛을 공급하는 반사판을 쓰러뜨릴 기회가 생긴다. [L]로 록온을 유지하고 미사일이나 Charge Beam을 쏴서 기절 상태로 묶어 둔 채 반사판 쪽으로 옆걸음질해 간다.
공략
FLIP THE RADAR DISH
It gains strength from sunlight, and happens to live in a room surrounded by four radar dishes.
Varia Suit를 지키는 거대한 Flaahgra를 기절시키면, 빨간 점이 보이는 레이더 접시를 하나씩 Charge Beam 한 발이나 Missile로 제자리에 고정할 수 있다. Samus는 록온한 채로 원을 그리며 움직여 접시에 다가간다.
LOCK ON AND ALTERNATE YOUR FIRE
You can use the opportunity to move to the next dish or attack the beast while it's distracted.
Control Stick과 B로 쓰는 대시는 Samus를 빠르게 움직이면서 록온을 유지하게 해 준다. 뒤집힌 접시가 Flaahgra의 주의를 곧바로 끌 때 도움이 된다.
ROLL INTO THE CHANNELS AND DROP A BOMB
The blast will kick you out, at which point you must repeat the entire process with more dishes.
접시가 뒤집히면 Flaahgra의 밑동에 통로가 열린다. Morph Ball로 그 안에 굴러 들어가 Bomb을 설치한다.
SPEEDY MORPH BALL
If you stay locked on to Flaahgra and keep circling, you can attack the boss and fire Missiles at the radar dishes at the same time.
Flaahgra를 쓰러뜨린 보상은 Varia Suit다.
Boss Battle: Flaahgra
Flaahgra is a huge mutant plant that’s been making all the water around here toxic.
The tricky part now is to knock the second one before Flaahgra gets a chance to flip the first one back.
It is crucial that you continue stunning Flaahgra.
이 식물은 햇빛으로 힘을 얻으므로 먼저 그것을 끊어야 한다. 햇빛이 없으면 Flaahgra는 한동안 움직이지 않아, 밑동의 관 네 개 모두에 폭탄을 설치할 시간이 생긴다. 반사판 밑동의 빨갛게 빛나는 구체에 Charge Beam이나 미사일을 맞히면 그 반사판이 멈추고, 첫 번째가 쓰러지면 Flaahgra는 네 개의 관 모두에서 뿌리를 빼낸다. 반사판에 다가가는 가장 효과적인 방법은 [L]로 Flaahgra를 록온하고 식물을 쏘면서 옆으로 이동하는 것이다. 사격은 피해를 주지 못하지만, 미사일과 Charge Beam은 잠시 기절시킨다. 쓰러져 있는 동안 사무스는 Morph Ball로 관 안에 굴러 들어가 안쪽 끝에서 폭탄을 터뜨려 Flaahgra의 그 부분을 파괴한다. 첫 번째 관을 부수면 반사판 두 개가 원래대로 돌아오며, 둘 다 쓰러뜨려야 한다. 이를 위해 사무스는 [L]로 록온하고 한쪽으로 옆걸음질한다. 달리는 것보다 훨씬 빠르고, 도는 동안에도 Flaahgra를 시야에 둘 수 있으며, 회복할 때마다 Charge Beam을 쏠 수 있다. 반사판에서는 빨간 구체에 차지 샷을 맞히면 쓰러진다. 거기서 같은 방식으로 다음 반사판으로 간다. Flaahgra를 기절시키지 않고 두면 앞서 쓰러뜨린 반사판을 다시 세워 처음부터 해야 하기 때문이다. 두 개를 모두 쓰러뜨리면 사무스는 가까운 관을 찾아 안에서 폭파한다. 그러면 반사판 두 개에 더해 세 번째도 원래대로 돌아오므로 세 개 모두 같은 방법으로 쓰러뜨린다. 그 뒤 네 개 모두가 한 번 더 원래대로 돌아온다. 네 번째이자 마지막 관을 파괴하면 싸움이 끝나며, 보상으로 Varia Suit를 얻는다.
TIP
Hitting Flaahgra while it’s already stunned only wastes missiles.
미사일로 기절시킬 때는 Flaahgra가 앞의 한 발에서 회복한 뒤에 다음을 쏘아야 한다.
TIP
Keep a steady strafe around Flaahgra as you go for the reflectors.
- HP
- 2000
- 게임 내 배치 수
- 1
- 로그북 분류
- Creatures
무기 효과
| 빔 | 일반 | 차지 |
|---|---|---|
| Power Beam | 대미지 | 대미지 |
| Ice Beam | 대미지 | 대미지 |
| Wave Beam | 대미지 | 대미지 |
| Plasma Beam | 대미지 | 대미지 |
| 무기 | 효과 |
|---|---|
| Super Missile | 대미지 |
| Ice Spreader | 대미지 |
| Wavebuster | 대미지 |
| Flamethrower | 대미지 |
| Missile Launcher | 대미지 |
| Morph Ball Bomb | 효과 없음 |
| Power Bomb | 효과 없음 |
| Boost Ball | 효과 없음 |
| Phazon Beam | 대미지 |